


Understanding Interlocking Rubber Floor Tiles
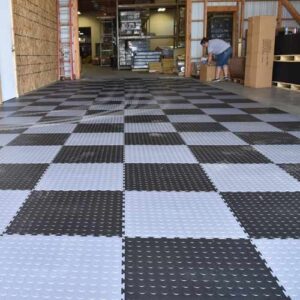
Interlocking rubber floor tiles are modular, puzzle-like mats designed to fit together seamlessly. They’re popular for gyms, garages, workshops, and even home interiors because they combine durability, comfort, and style in one system. Each tile locks with its neighbor—no glue, no mess, just clean, sturdy flooring that’s ready for action.
Unlike standard roll-out rubber mats, interlocking floor tiles are easier to install, repair, or replace. They also come in a range of materials like PVC interlocking tiles or heavy-duty rubber, depending on the space’s needs.
If you’re shopping for reliable options, check out Cape Lock Tiles’ interlocking rubber tiles. Their range includes heavy-duty designs ideal for high-traffic areas like gyms or garages.
Types of Interlocking Rubber Flooring
Not all tiles are made equal. Here’s what you’ll find on the market:
-
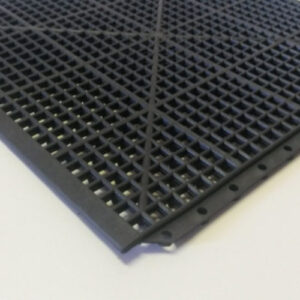
Rubber Interlocking Flooring: Best for gyms, play areas, and workplaces that need shock absorption and slip resistance.
-
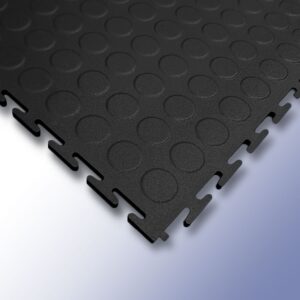
PVC Interlocking Tiles: More rigid and often used for garages or industrial floors. You can explore PVC garage floor tiles for this application.
-
Heavy-Duty Industrial Rubber Tiles: Built to withstand vehicle weight, oil spills, and impact—ideal for warehouses or mechanical workshops.
Each has distinct benefits, but all share one goal: easy installation and long-lasting protection.
Benefits of Interlocking Rubber Floor Tiles
-
Durability: Designed to handle heavy loads and foot traffic.
-
Safety: Slip-resistant surface even when wet.
-
Noise Reduction: Great for gyms or workshops where noise is constant.
-
Comfort: Softer underfoot than concrete or ceramic.
-
Modularity: Replace single tiles without redoing the whole floor.
Tools and Materials You’ll Need
Before you start, gather the basics:
-
Rubber mallet
-
Utility knife with extra blades
-
Measuring tape and chalk line
-
Straight edge or ruler
-
Vacuum or broom for cleaning the surface
-
Optional: knee pads for comfort
Safety-wise, wear gloves and eye protection when cutting or trimming tiles.
Preparing the Subfloor for Installation
A clean, level, and dry subfloor is critical. Sweep or vacuum thoroughly, removing dust and debris. Check for cracks or uneven spots—rubber tiles can bridge minor imperfections, but not large gaps or holes.
For garages or outdoor installations, allow the floor to dry fully before laying tiles to avoid trapped moisture.
Measuring and Planning Your Layout
Start by measuring your space and marking your center point with chalk. Work outward from the middle to ensure even spacing. Always dry-fit the tiles first—this helps you visualize the layout and avoid last-minute surprises.
Plan cuts at the walls or edges, not in high-traffic zones.
Step-by-Step Installation Guide
-
Dry-Fit the First Row: Begin from one corner or the center.
-
Lock Tiles in Place: Use gentle pressure or a rubber mallet to interlock edges.
-
Cut to Fit: Use a utility knife and straight edge for precision.
-
Finish Edges: Install transition strips if needed for doorways or open ends.
-
Check for Alignment: Every few rows, ensure seams remain tight and straight.
Installing Around Obstacles
When fitting tiles around columns, drains, or walls, trace the shape onto the tile and cut slowly. Always double-check your measurements before cutting—small mistakes can break the visual flow.
Common Mistakes to Avoid
-
Skipping the dry-fit step
-
Not cleaning the subfloor
-
Overstretching tiles or forcing joints
-
Ignoring room expansion (leave a 5mm gap around walls)
Post-Installation Tips
After installation, allow the tiles to settle for 24 hours. This helps them adapt to room temperature and prevents shifting. If used in a garage or gym, avoid placing heavy machinery or racks until the floor has rested.
How to Clean and Maintain Rubber Interlocking Flooring
Maintenance is straightforward:
-
Sweep or vacuum weekly.
-
Mop monthly using mild soap and water.
-
Avoid harsh chemicals or solvents that may degrade the surface.
-
For gyms or garages, degrease periodically with a rubber-safe cleaner.
Check out Cape Lock Tiles’ rubber mats collection for cleaning-friendly flooring options.
Dealing with Stains and Odors
For oil stains or gym sweat buildup:
-
Sprinkle baking soda and leave for an hour before mopping.
-
Use diluted vinegar for odor removal.
-
Rinse thoroughly to avoid residue.
When to Replace or Reconfigure Flooring
Signs it’s time to swap tiles:
-
Visible cracking or compression
-
Persistent odor even after cleaning
-
Loose interlocks
Because they’re modular, you can easily replace a single damaged tile instead of the entire floor—saving time and cost.
Safety and Eco-Friendly Benefits
Modern rubber interlocking flooring is often made from recycled materials and designed to be non-toxic. It’s slip-resistant and cushions impact—ideal for both home and commercial use.
Where to Buy Quality Tiles
For durable, South African-made products, explore Cape Lock Tiles’ garage flooring collection or request a quick quote for large installations. They specialize in rubber interlocking tiles that combine performance and visual appeal.
FAQs About Installing and Maintaining Interlocking Rubber Floor Tiles
1. Can I install interlocking floor tiles on uneven concrete?
Minor imperfections are fine, but large dips should be leveled first.
2. Do I need adhesive?
No, tiles interlock firmly—adhesive is optional for permanent setups.
3. How do I cut tiles cleanly?
Use a utility knife with several passes instead of one deep cut.
4. Are these tiles waterproof?
They’re water-resistant but not fully waterproof; seal edges in wet zones.
5. Can I move tiles to another space?
Yes. They’re modular and reusable—just unlock and reinstall.
6. How long do rubber interlocking tiles last?
Typically 10–20 years with basic maintenance.
Conclusion: A Professional Finish for Every Space
Installing interlocking rubber floor tiles isn’t just a DIY project—it’s an upgrade in comfort, safety, and style. With proper preparation, cleaning, and care, your flooring will stay durable and fresh-looking for years.
For premium-quality options, explore Cape Lock Tiles’ interlocking floor tiles collection—built tough for any space, from home gyms to industrial workshops.